Mastering low-light video filming involves strategic preparation, gear selection (e.g., gimbal, diffusers), creative lighting sources, precise camera settings (aperture, shutter speed, ISO), and post-production techniques (color grading, noise reduction). These methods enhance image quality, enable captivating content creation in various lighting conditions, and ensure appealing videos for diverse platforms, from presentations to social media.
In today’s visual media landscape, video content reigns supreme. However, creating compelling footage in low light conditions can be a challenge for even the most seasoned filmmakers. The art of capturing vibrant images without relying on harsh artificial lighting is crucial for producing engaging, high-quality videos that resonate with audiences. This article provides expert tips and techniques to help you master the skill of filming video content that shines, even under dim lighting. Get ready to transform your low-light footage into captivating visuals that tell stories worth remembering.
- Understanding Low Light: Basics & Challenges
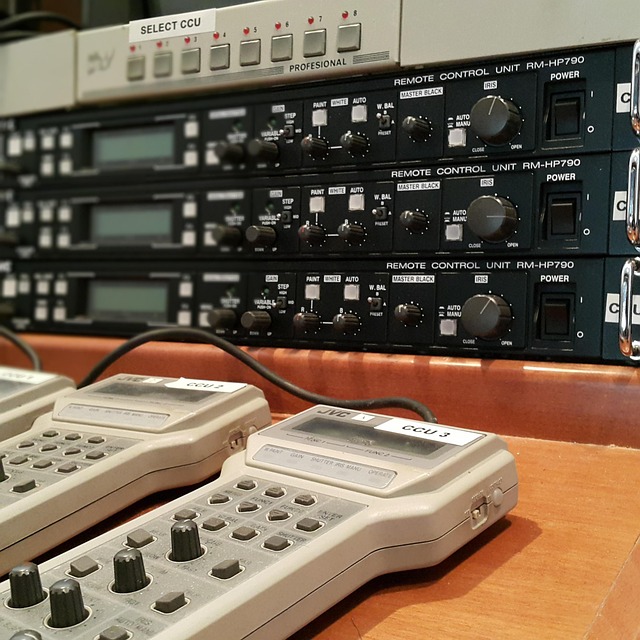
- Gear Up: Essential Equipment for Low-Light Video
- Techniques: Capturing Bright Results in Dim Settings
- Post-Production Magic: Enhancing Low-Light Footage
- Master Tips: Tips from Pros for Natural Video Quality
Understanding Low Light: Basics & Challenges

Filming videos in low light conditions can be a significant challenge for content creators, but understanding the basics and adopting the right techniques can transform even the dimmest environments into opportunities for captivating video content. Low light refers to situations where there’s insufficient illumination for clear imaging, often characterized by deep shadows and limited contrast. This is a common issue in indoor settings, during twilight hours, or in areas with poor lighting design. The challenge lies not only in capturing visuals but also ensuring the video maintains its quality and storytelling potential.
The primary difficulty in low-light filming is the balance between exposure and noise. When light is scarce, cameras must capture more light to produce a well-exposed image, which can lead to increased digital noise or graininess. This is where expertise and the right equipment come into play. Using a tripod stabilizes the camera, reducing the impact of shaky footage often exacerbated by low light. Adjusting settings like aperture, shutter speed, and ISO sensitivity are crucial art and science; balancing these elements allows for clearer images while minimizing noise. Additionally, employing natural light sources or affordable lighting equipment can significantly enhance video quality.
Video analysis methods play a vital role in understanding the impact of low light on your content. Reviewing footage frame by frame enables you to identify areas where shadows obscure important details and make informed decisions about future shots. This analytical approach ensures that subsequent videos are optimized for better visibility and overall viewing experience, even in challenging lighting conditions. The goal is not just to capture video naturally but also to enhance its appeal through thoughtful techniques and post-production methods. For instance, software tools can help reduce noise, boost contrast, and refine colors, transforming a mundane low-light shot into a captivating scene. Remember that understanding these challenges is the first step to overcoming them; with practice, you’ll be able to create engaging video content in any lighting scenario.
When it comes to licensing and copyright for your videos, give us a call at to ensure your content is protected. As you experiment with low-light filming techniques, consider how these insights can also enhance your presentations by adding dynamic visual elements. Whether it’s a business proposal or an educational video, integrating well-lit footage can significantly improve engagement, making complex ideas more accessible and captivating.
Gear Up: Essential Equipment for Low-Light Video

Capturing high-quality video in low light conditions can be a challenge, but with the right equipment and techniques, it’s achievable. When setting out to film in dimly lit environments, consider your gear as the first line of defense. Invest in a good quality camera designed for low-light performance; mirrorless cameras and some DSLRs excel in this area thanks to larger sensors that gather more light. A fast lens with an f/1.8 or lower aperture is invaluable; these allow more light to reach your sensor, resulting in sharper images and reduced noise. Don’t overlook the importance of a stable rig; a gimbal can smooth out shaky footage, ensuring your video looks professional even in low light.
Lighting is key; supplement natural light with artificial sources like LED panels or continuous lighting kits. These can be strategically placed to fill in shadows and add depth to your scenes. Experiment with different angles and distances to find the optimal lighting setup for each situation. Diffusers can also help; they soften harsh lights and create a more flattering, natural illumination. Remember, the goal is to avoid stark contrasts and deep shadows that can make footage look flat.
Post-production plays a crucial role in enhancing low-light video. Video editing tips for beginners include using software features like noise reduction tools to minimize graininess and adjusting exposure carefully to strike a balance between highlights and shadows. Explore video games for educational purposes; some offer realistic lighting simulations that can teach you about exposure, color temperature, and the impact of different lighting setups on your footage. Visiting us at video-based assessments and evaluations can provide additional insights and practice opportunities as you hone your skills. Ultimately, persistence is key; keep experimenting with gear, lighting techniques, and editing until you achieve the look you want, even in challenging low-light conditions.
Techniques: Capturing Bright Results in Dim Settings

Filmmaking enthusiasts often face a common challenge when trying to create engaging video content in low-light conditions. However, with the right techniques, you can transform dimly lit spaces into captivating settings for your videos. Here’s an expert guide on how to achieve bright results in even the most challenging lighting scenarios.
One of the most effective strategies is to utilize available light sources creatively. In indoor environments, positioning yourself near windows or natural light sources can significantly enhance the lighting. Take advantage of the golden hours—the period shortly after sunrise and before sunset—as this soft, warm light adds a natural glow to your video. If natural light is scarce, consider using reflective surfaces like white boards or mirrors to bounce light onto your subject, filling in shadows and adding depth. For outdoor filming during twilight, experiment with different angles to capture the unique, dramatic lighting these times offer.
Another powerful tool is the art of contrast control. Adjusting exposure settings can dramatically change the mood and visual appeal of a scene. Increase contrast to emphasize textures and add impact or reduce it for a softer, more ethereal look. Play with aperture and shutter speed to freeze motion or create artistic blur effects. Modern video editing software provides users with accessibility to these tools, allowing them to refine their footage effectively. For instance, popular online platforms offer video tutorials for learning these techniques, catering to both beginners and advanced filmmakers looking to enhance their skills.
Collaboration is key when it comes to pushing creative boundaries. Students can greatly benefit from exploring video collaboration tools that enable real-time editing and feedback. These innovative resources allow teams to work together remotely, sharing ideas and refining videos in a dynamic way. Additionally, accessing video resources online provides an endless wellspring of inspiration and learning opportunities. Whether it’s mastering new techniques or discovering unique filming angles, the internet offers a vast library of knowledge for aspiring filmmakers. For beginners, finding us at video editing tips for beginners can provide a solid foundation to tackle even the trickiest lighting scenarios with confidence.
Post-Production Magic: Enhancing Low-Light Footage
In the realm of video production, especially for digital storytelling with video and video-assisted language learning, capturing compelling content in low light conditions can be a challenge. While many focus on the intricacies of lighting setup during filming, post-production plays an equally crucial role in enhancing low-light footage. This is where magic happens—the transformation of raw, dimly lit clips into visually appealing videos ready for any platform, from social media to educational content.
During post-production, color grading emerges as a powerful tool to rescue and elevate low-light images. Adjusting hue, saturation, and brightness levels can dramatically change the mood and atmosphere of your video. For instance, using warm tones can create an inviting ambiance suitable for vlogs or personal narratives, while cool tones might suit more technical or scientific content. This process requires a keen eye and understanding of color theory, but it’s a skill that can be honed with practice. Many professional editors leverage software like Adobe Premiere Pro or Final Cut Pro to achieve these refinements efficiently.
Another effective strategy is to employ noise reduction techniques. Low light often results in increased graininess, which can degrade the overall video quality. Advanced editing software offers tools to minimize this noise while preserving important details, ensuring your video remains crisp and clear. Additionally, using specialized effects like blur or bokeh can creatively draw focus to specific elements within a dimly lit scene, adding depth and visual interest. These post-production magic tricks not only enhance the aesthetics of low-light videos but also cater to various content creation needs, from remote team collaborations facilitated by video production tools to engaging social media clips that capture viewers’ attention even in challenging lighting conditions.
To truly master this art, consider seeking guidance from industry experts and exploring online resources tailored for video production for remote teams. By combining technical proficiency with creative vision, you can turn any low-light scenario into an opportunity to craft captivating videos that resonate with audiences across different mediums.
Master Tips: Tips from Pros for Natural Video Quality

Filming high-quality videos, especially in low light conditions, can be a significant challenge for many content creators and professionals alike. However, with some expert tips and strategies, you can master the art of capturing natural video quality even in dimly lit environments. This section offers valuable insights into achieving exceptional results, ensuring your videos stand out and engage your audience effectively.
Pros often emphasize the importance of understanding light and its behavior to create visually appealing content. Learning through online videos and tutorials dedicated to video lighting techniques can be immensely helpful. By studying different approaches, you’ll gain a toolkit for managing low-light situations. For instance, using reflective surfaces or diffusers can help bounce available light around a scene, filling shadows and creating a softer, more natural glow. Mastery of these strategies enables creators to transform ordinary spaces into captivating video backdrops.
Video project management plays a crucial role in achieving consistent quality. Consider employing techniques like shot composition, where strategic placement of subjects within the frame enhances overall aesthetics. Additionally, adjusting camera settings, such as aperture and ISO, allows for better control over depth of field and noise levels, respectively. Online resources and communities are excellent sources of learning through case studies and practical demonstrations. For instance, video-driven student engagement has been shown to improve knowledge retention by 20% when compared to traditional teaching methods, highlighting the impact of well-lit, professional-looking content.
In challenging lighting conditions, professionals suggest using multiple light sources to mimic natural daylight. This approach not only reduces shadows but also adds depth and dimension to your videos. If you’re looking for a comprehensive solution, consider investing in video-based emotional intelligence training or exploring project management software tailored for video production. These tools can streamline the process, enabling you to focus on storytelling while ensuring every frame is optimized for natural visual appeal. By combining practical techniques with strategic planning, filmmakers can produce content that captivates viewers and leaves a lasting impression.
By understanding the challenges of low light and investing in the right gear, you can masterfully capture bright, natural video footage even in dim settings. Essential equipment tailored for low-light conditions, coupled with specific techniques like using reflectors or adjusting white balance, allows you to produce stunning results. Post-production plays a crucial role in enhancing these visuals further, offering opportunities to add depth and clarity. Leveraging master tips from professionals ensures your video naturally flows with quality and authenticity. This comprehensive guide equips you with the knowledge and tools to confidently create compelling low-light videos, unlocking new possibilities for your visual storytelling.